Here is a link to the image I'm using so you can follow along if you want:
http://farm4.static.flickr.com/3661/3599850072_bca415dd52_o.jpg
First, you need to select the section of the image you want to be in focus:
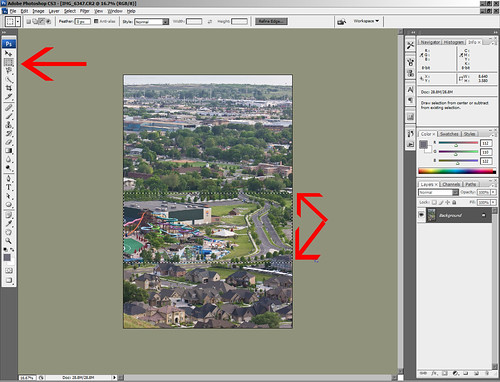
If you need to change the orientation of your selection at all, use the "Transform Selection" option here:
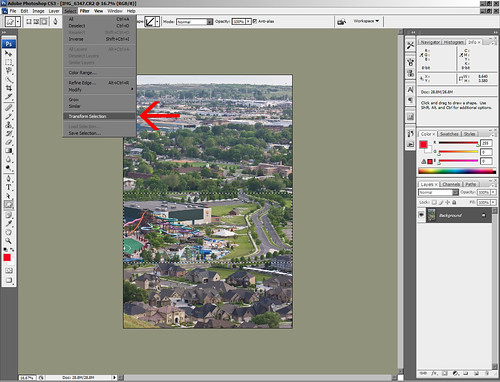
Make sure your edges aren't ending before the edge of the photo. Otherwise, they'll be blurred and it will look weird. Apply your changes by hitting the check mark:

Next, invert the selection so you're selecting everything but the area you want in focus.
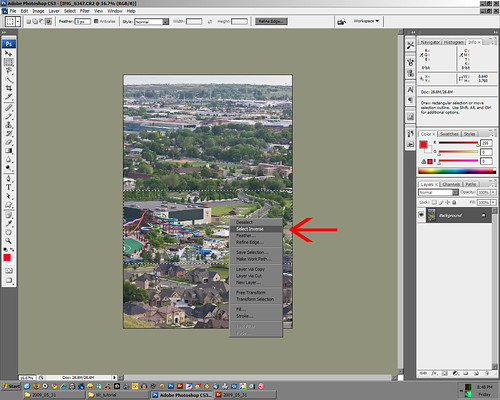
If your photo has walls or anything on the sides, you'll need to select that area, too because it won't really sell the effect to only have the ground in focus. This photo isn't the best option to show what I'm talking about, but hopefully you understand. In order to add to your selection, make sure you're on the "Rectangular Marquee Tool", hold shift and select the areas you would like to add to the selection area:
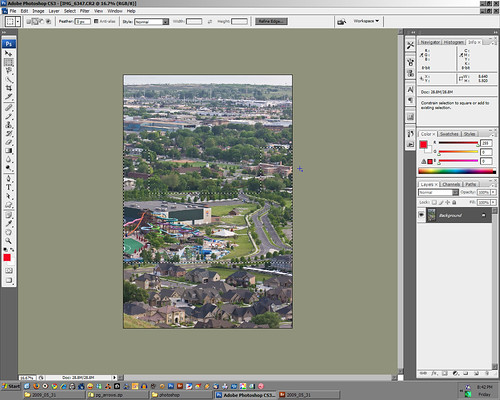
Here's a photo where I had to select the walls and stuff because just choosing the ground would have looked strange:
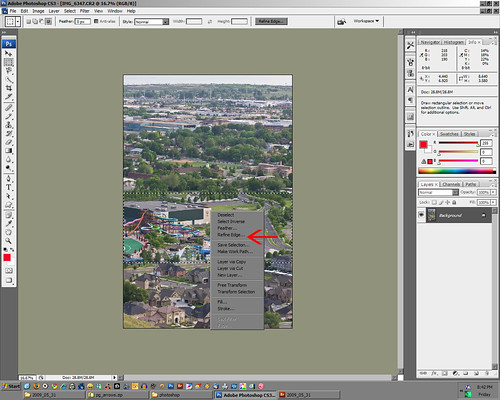
We need to refine the edge a bit. This adds a gradual change from the in focus area to the bokeh. Since we inverted the selection, this will apply to your foreground and background. Right click and choose "Refine Edge" (I forgot to inverse my selection the first time around so the selected area in my photo below is different than what you'll see. This is the only step that should have affected):
You're going to use the "Feather" slider to create the gradual shift from in focus to bokeh (this might look different, too because of the whole "forgetting to inverse my selection" issue I just spoke of. The white area might be opposite). How much you choose is up to you. You can also use the "Contract/Expand" slider to adjust your overall selection, too:
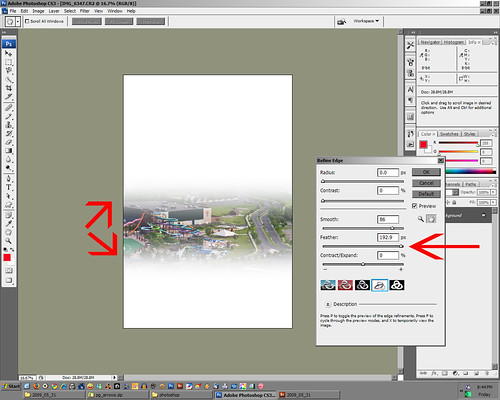
After you're done with that, the window will close and it will go back to your photo. It will look as though nothing happened, but you will see that it did in the next step.
Here we apply the blur. Go to Filter -> Blur -> Lens Blur:
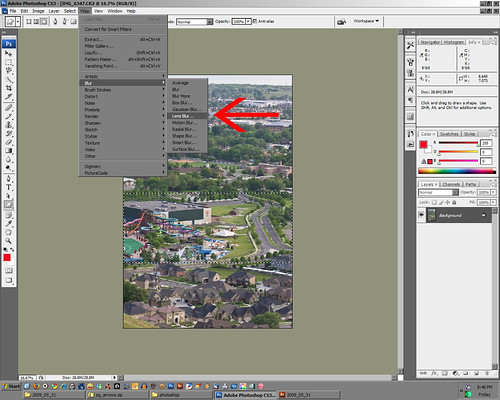
Once in the lens blur tool, use the "Radius" to determine the amount of blur applied to the photo. I've found it's best to not go too overboard here. Once you hit "OK", this filter takes FOREVER to apply. Hang tight:

Now I want to add a bit more blur to the area behind my object to creat more depth up front (hopefully). Create a copy of your background layer (by right clicking and hitting the "Duplicate Layer" option. Once you're copied, go into the lens blur and use the radius slider to bump up a bit more blur than what you had previously. This should blur the entire photo. Don't worry, we'll fix that in the next couple of steps:
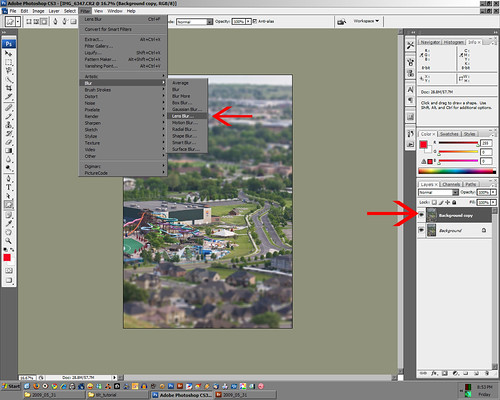
Now, click on the "Add Layer Mask" adjustment layer (in the bottom right hand corner) while having the background layer selected. You'll see a white area show up just to the right of the background copied layer. This is a layer mask. As long as it's white, that means that layer will show up:
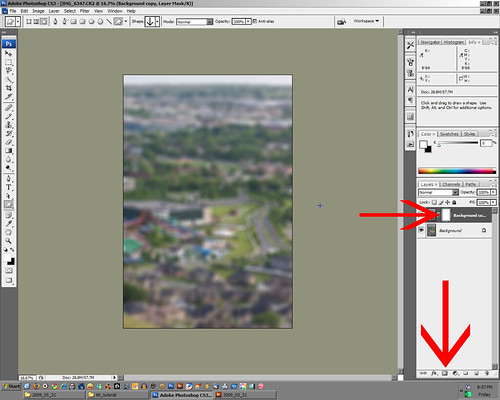
Now choose the Gradient Tool in your tool bar. In the upper left hand corner, make sure you're using the "Black to White" gradient. You'll want to click right where the blur begins in the background and drag it up as far as you like. You're telling it where the background copy layer should begin and how quickly the transition to full background copy layer will take place:

In this photo, you can see that the background copy layer will be coming in 100% due to the layer mask being white just above the tree line toward the top:
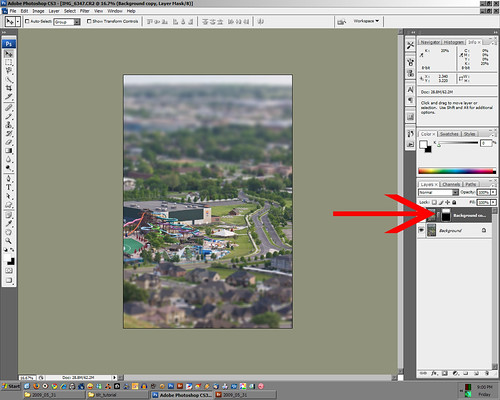
To me, adding that second background copy layer with additional blur helps sell the effect. Up to you whether you want to use it, though.
Almost done. I like to merge my background copy layer down to my original layer here. You can do this by hitting ctrl+shift+E on a PC. I don't now what the combination is on a Mac (sorry).
Here we'll use a "Hue and Saturation" adjustment layer to boost the saturation. When you see models and stuff, it's not uncommon to see bright, unspoiled colors so we're not really going for a realistic amount of saturation, but you don't want to overdue it:
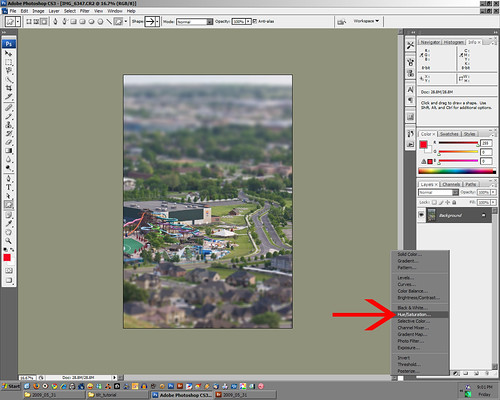
Now, I like to change the blend mode of that adjustment layer to "Color" so it will only affect the color and not the contrast:
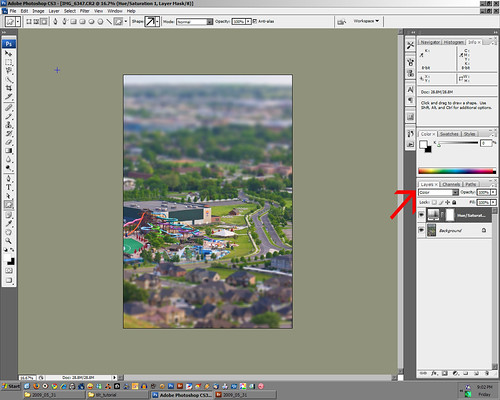
You're done. There are some areas where the amount of blur or saturation is purely up to you. Play around to see what you like.
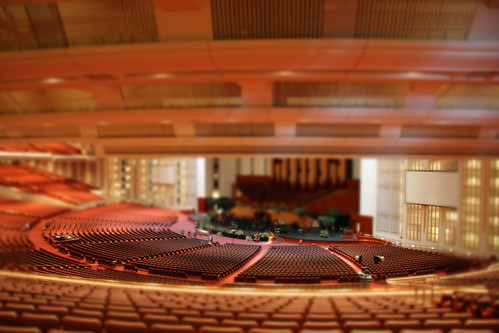
Here is the final product using this tutorial (in my photo in my last post I tweaked a few colors and stuff so things weren't as vibrant... That's all up to you from here):

Let me know if anything doesn't make sense or if you have questions.
No comments:
Post a Comment