Sunday, June 28, 2009

Lehi Round Up, 2009

We attended the Lehi Round Up rodeo this weekend. The most exciting event was probably the bareback riding.

You can view the entire set here:
http://www.flickr.com/photos/hypnoeyez99/sets/72157620692051834/

Here are a few select photos:
Lehi Round Up 2009

This guy actually had the worst ride of the night (including the bulls). I'm posting the best shots from his ride because he got worked something awesome:
Lehi Round Up 2009
Lehi Round Up 2009
Lehi Round Up 2009
Lehi Round Up 2009
Lehi Round Up 2009
Lehi Round Up 2009
Lehi Round Up 2009
Lehi Round Up 2009
Lehi Round Up 2009
Lehi Round Up 2009
Lehi Round Up 2009
Lehi Round Up 2009
Lehi Round Up 2009
Lehi Round Up 2009
Lehi Round Up 2009
Lehi Round Up 2009
Lehi Round Up 2009
Lehi Round Up 2009
Lehi Round Up 2009

After that last shot the other guys in the arena jumped in to help him because his hand was caught in the rope. I didn't really get any other shots after that, but he didn't get up for a few minutes. A couple things I find amazing were how high that horse got off the ground and also how many times that guy was hanging off one side of the horse, then after a quick buck, on the opposite side.

I also practiced my panning technique. This is one of my favorite shots of the night:
Lehi Round Up 2009
Here are a couple others...
Lehi Round Up 2009
Lehi Round Up 2009

I have photos of the parade that morning I've yet to process. We also too the Holga out, so I'll be getting those shots developed tomorrow. Hopefully something worthwhile came from them. I was shooting with Ilford Delta 100 120 format film.

Monday, June 22, 2009

Spider Attack

I caught this spider in my house Sunday night. I was busy reformatting my hard drive all day so I stuck him in a small glass and held him there until tonight. I corralled him in my light box and got about 20 shots off before releasing him outside. By the way, this spider was around an inch and a half small. Macro lenses rock.

Click to see it large:
Jumping Spider

Thursday, June 18, 2009

Shot of Mushna

I was bored and wanted to play with my flashes a bit. I bugged Mushna enough that she came and modeled for me. I played with a few different light set-ups. I wanted to get her skin to pop against a black background. I know I have a lot to learn with the off-camera flash stuff, but I liked how this turned out.

Mushna

Saturday, June 13, 2009

Stuff

The weather here in Utah has been absolutely awful for the last few weeks... Pretty much straight. We drove about two hours out to a small town called Hanna for our family reunion in hopes there would be enough of a break that we could camp out there. Not only was it cold, there was no relief from the rain there, either. We drove back and made it home through the canyon in the middle of a nice, heavy rain storm and made it home at around 11:00 pm.

For my birthday, I decided to pick up some radio triggers. After much deliberation, I decided to get the CyberSync triggers made by Paul C Bluff / Alienbees. I decided on these because they're amazingly priced. I paid $220 for one trigger and two receivers. If I had settled on Pocket Wizards, I would have been looking at ~$200 for one trans-receiver. The only real difference I've read about so far is that the Pocket Wizards are rated to communicate at 1,600 feet. In other words, if I have a pocket wizard on my flash, and one on my camera, I can be 1,600 feet away, hit the trigger and my flash would pop. The CyberSyncs are only rated for 400, which is probably more than I'll ever use.

Here are the triggers (one CST and two CSB's):
http://www.alienbees.com/remotes.html

I plan on investing in Alienbee lighting when I have the money and feel it would be a worthy investment.

Here is my set-up (the trigger is unmounted in the middle because I don't have back up camera yet):
CyberSync

What you are seeing is a CyberSync receiver plugged into the PC port on my 580 EX II (the 580 EX II is the first Canon speedlight to offer a PC port) on the right. On the left is my 430 EX sitting in a hot shoe adapter. Because the 430 EX does not offer a PC port, I have the CyberSync running a cable into a hot shoe adapter. The receiver gets the signal from the transmitter, sends it through the cable, through the adapter and then my flash receives it and fires. The hot shoe adapter was $16.50 and I purchased it from Lon at www.flashzebra.com.

Finally, I picked up a set of gels so I can color balance/effect my flash output from www.photogels.com.

All of the companies I've worked with have been excellent. The hot shoe adapter I received from Lon at flash zebra didn't fit quite right, but he went above and beyond to resolve the situation (far beyond my expectations) and I am 100% satisfied.

I've also purchased a couple of Manfrotto light stands:
http://www.bhphotovideo.com/c/product/612771-REG/Manfrotto_by_Bogen_Imaging_5001B_5001B_Nano_Black_Light.html

And a couple of Wescott 45" shoot-through/reflective umbrellas:
http://www.bhphotovideo.com/c/product/63319-REG/Westcott_2016_Umbrella_White_Satin_.html#features

My purchases were heavily influenced by this article on www.strobist.com:
http://strobist.blogspot.com/2006/03/lighting-101-traveling-light.html

While my set up doesn't break down as compact as his, it's still very convenient. If you're interested in lighting and have no idea where to start, this is a big help. I was totally lost until I started reading the lighting 101 section of his blog/site.

So the weather is crappy and I'm sitting here with all this great gear not being able to get a good chance to use it. Yeah, this sucks.

Silver lining...

We had a pretty wicked storm front move across the valley today. It was over us in no time. The lowest clouds were moving so fast (the dark mass in the lower right of the first image), that I was almost worried we would be seeing tornadoes or something. The sky was so green and the wind was coming in so fast, I wasn't sure what was going to happen:

Massive Storm Front

Massive Storm Front

Also, a couple of days ago a pretty wicked storm moved through, but opened up toward the end of the evening. As it was leaving, it left a wide open sky for the sun to set in. This led to one of the largest rainbows I've ever seen.

Call me crazy, but I really like this shot:
Chasing Rainbows

Here are a couple with the rainbow and Mushna in full effect:

Chasing Rainbows

Chasing Rainbows

This also gave me the opportunity to snap one of my my favorite photos I've shot in a long time:
Chasing Rainbows

One last note on lighting... Based on a recommendation from the Strobist site, I found this photographer:
http://www.flickr.com/photos/polvero/

He makes excellent use out of a lot of the same types of gear I just purchased. I'm really anxious to get out to see if I can get some good results like this (eventually).

Here's to the hope of better weather...

Friday, June 5, 2009

Fake Tilt Shift Tutorial

Here is my tilt shift tutorial. Hopefully I covered it okay. If you have questions, let me know.

Here is a link to the image I'm using so you can follow along if you want:

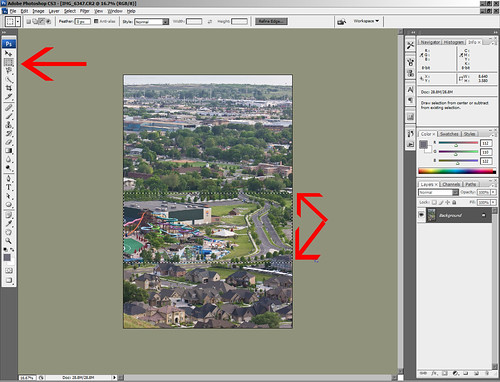
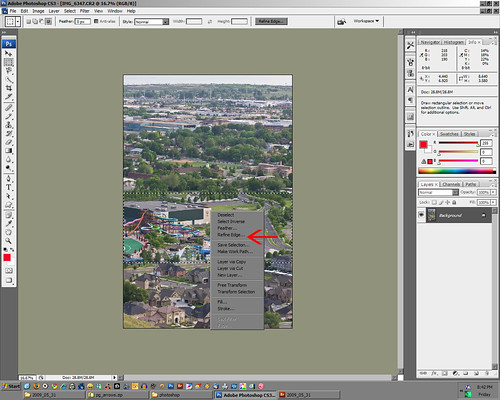
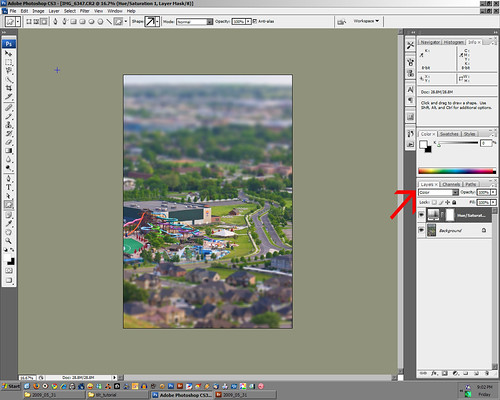
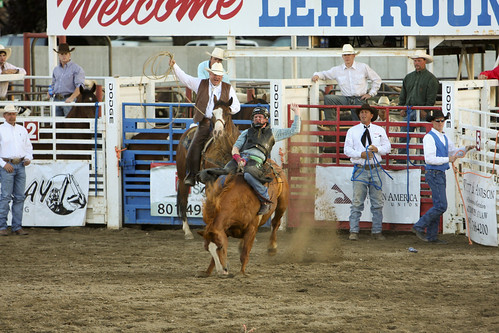
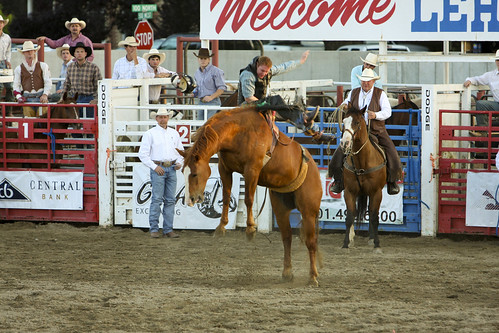
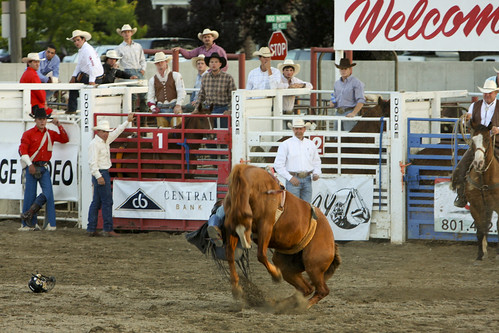
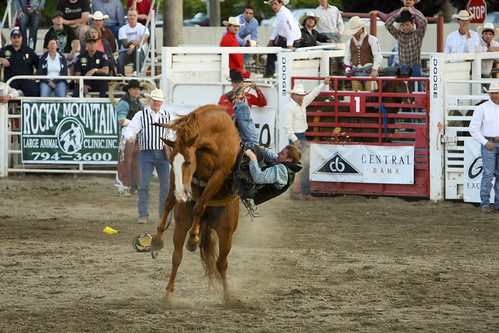
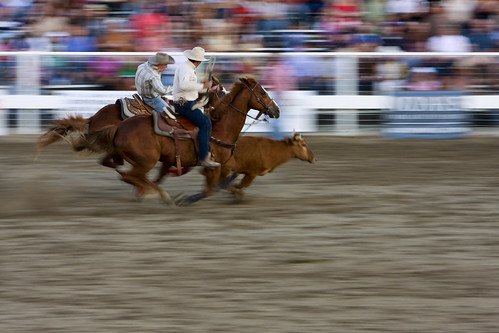
http://farm4.static.flickr.com/3661/3599850072_bca415dd52_o.jpg

First, you need to select the section of the image you want to be in focus:
1

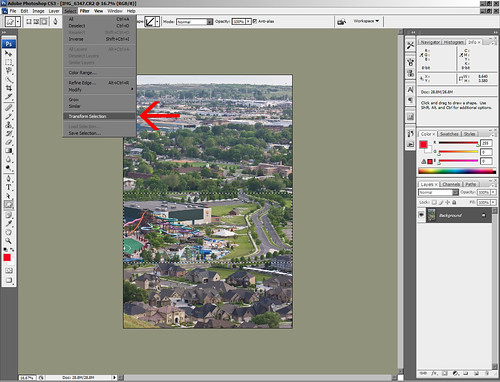
If you need to change the orientation of your selection at all, use the "Transform Selection" option here:
3

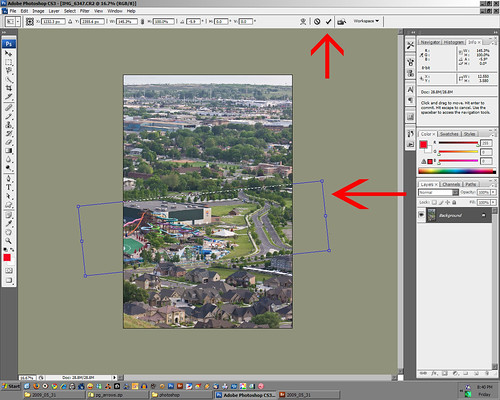
Make sure your edges aren't ending before the edge of the photo. Otherwise, they'll be blurred and it will look weird. Apply your changes by hitting the check mark:
4

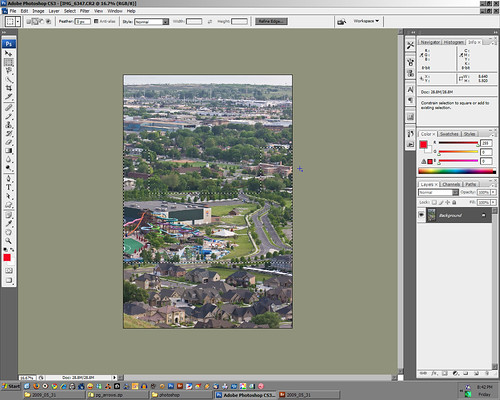
Next, invert the selection so you're selecting everything but the area you want in focus.
2

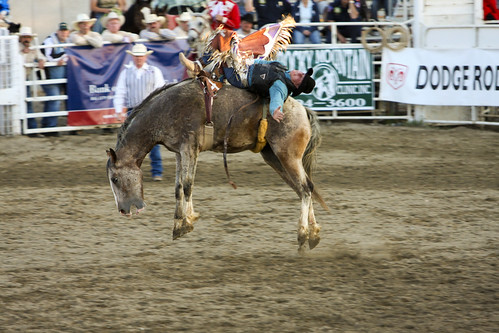
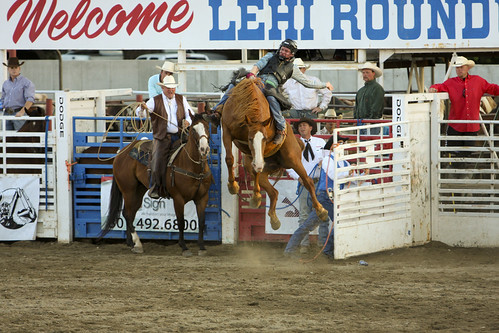
If your photo has walls or anything on the sides, you'll need to select that area, too because it won't really sell the effect to only have the ground in focus. This photo isn't the best option to show what I'm talking about, but hopefully you understand. In order to add to your selection, make sure you're on the "Rectangular Marquee Tool", hold shift and select the areas you would like to add to the selection area:
5

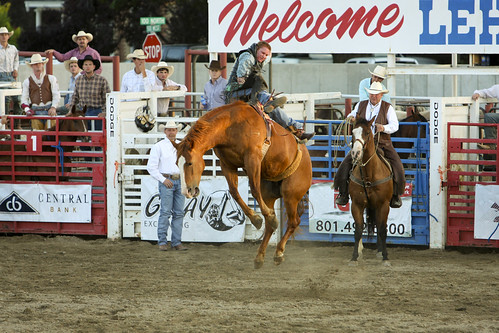
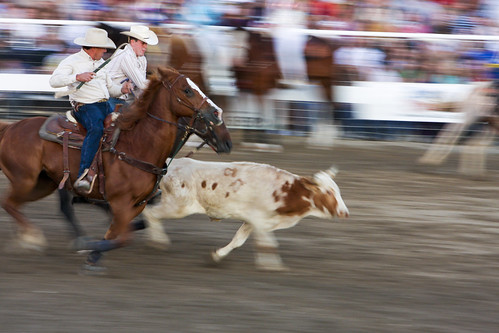
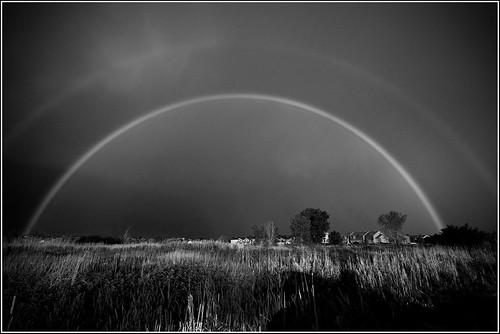
Here's a photo where I had to select the walls and stuff because just choosing the ground would have looked strange:
LDS Conference Center

We need to refine the edge a bit. This adds a gradual change from the in focus area to the bokeh. Since we inverted the selection, this will apply to your foreground and background. Right click and choose "Refine Edge" (I forgot to inverse my selection the first time around so the selected area in my photo below is different than what you'll see. This is the only step that should have affected):
6

You're going to use the "Feather" slider to create the gradual shift from in focus to bokeh (this might look different, too because of the whole "forgetting to inverse my selection" issue I just spoke of. The white area might be opposite). How much you choose is up to you. You can also use the "Contract/Expand" slider to adjust your overall selection, too:
7

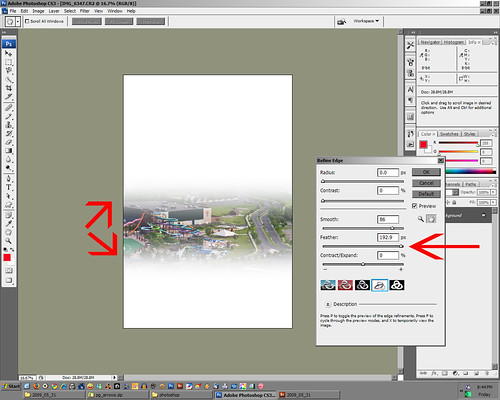
After you're done with that, the window will close and it will go back to your photo. It will look as though nothing happened, but you will see that it did in the next step.

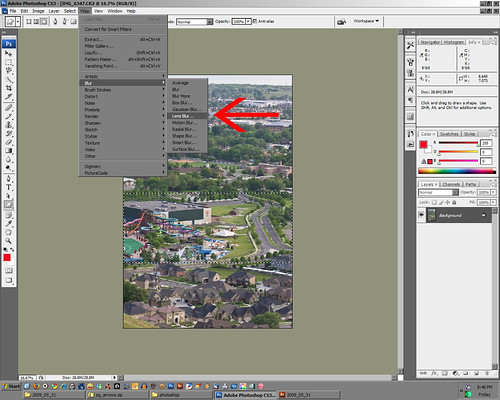
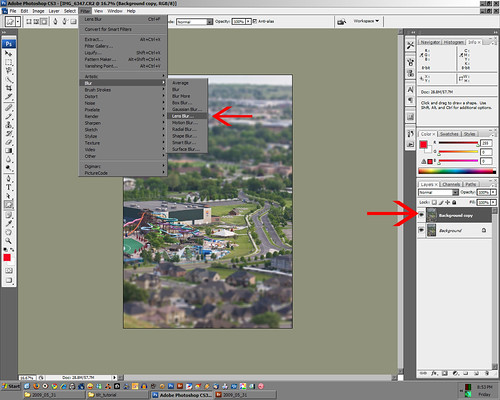
Here we apply the blur. Go to Filter -> Blur -> Lens Blur:
8

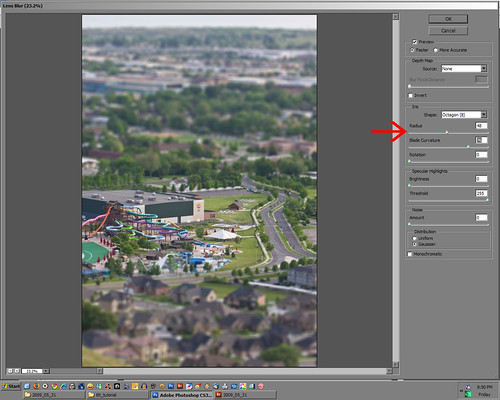
Once in the lens blur tool, use the "Radius" to determine the amount of blur applied to the photo. I've found it's best to not go too overboard here. Once you hit "OK", this filter takes FOREVER to apply. Hang tight:
9

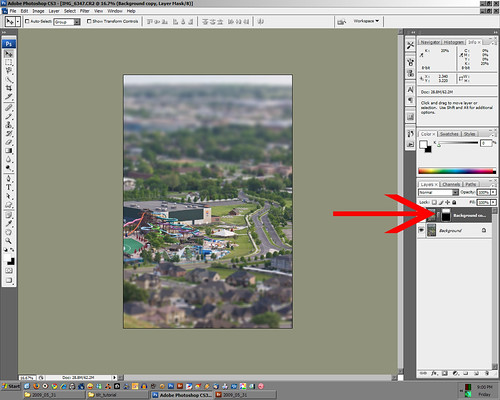
Now I want to add a bit more blur to the area behind my object to creat more depth up front (hopefully). Create a copy of your background layer (by right clicking and hitting the "Duplicate Layer" option. Once you're copied, go into the lens blur and use the radius slider to bump up a bit more blur than what you had previously. This should blur the entire photo. Don't worry, we'll fix that in the next couple of steps:
10

Now, click on the "Add Layer Mask" adjustment layer (in the bottom right hand corner) while having the background layer selected. You'll see a white area show up just to the right of the background copied layer. This is a layer mask. As long as it's white, that means that layer will show up:
11

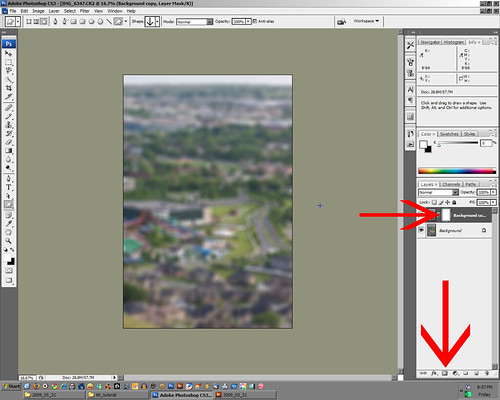
Now choose the Gradient Tool in your tool bar. In the upper left hand corner, make sure you're using the "Black to White" gradient. You'll want to click right where the blur begins in the background and drag it up as far as you like. You're telling it where the background copy layer should begin and how quickly the transition to full background copy layer will take place:
12

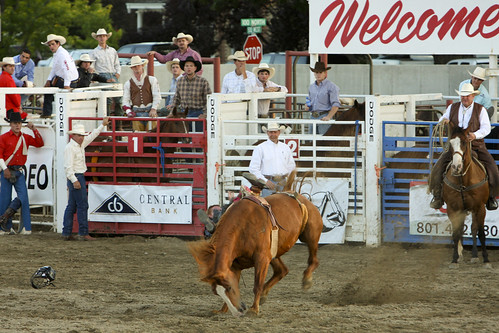
In this photo, you can see that the background copy layer will be coming in 100% due to the layer mask being white just above the tree line toward the top:
13

To me, adding that second background copy layer with additional blur helps sell the effect. Up to you whether you want to use it, though.

Almost done. I like to merge my background copy layer down to my original layer here. You can do this by hitting ctrl+shift+E on a PC. I don't now what the combination is on a Mac (sorry).

Here we'll use a "Hue and Saturation" adjustment layer to boost the saturation. When you see models and stuff, it's not uncommon to see bright, unspoiled colors so we're not really going for a realistic amount of saturation, but you don't want to overdue it:
14

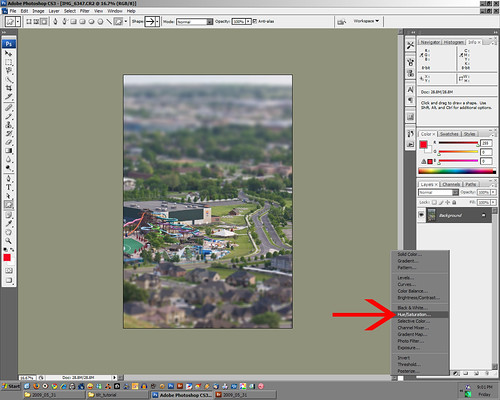
Now, I like to change the blend mode of that adjustment layer to "Color" so it will only affect the color and not the contrast:
15

You're done. There are some areas where the amount of blur or saturation is purely up to you. Play around to see what you like.

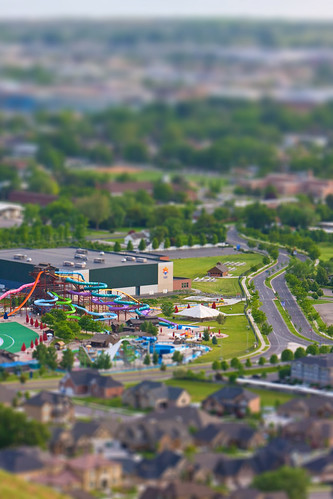
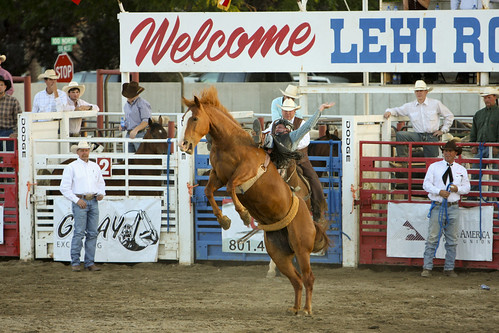
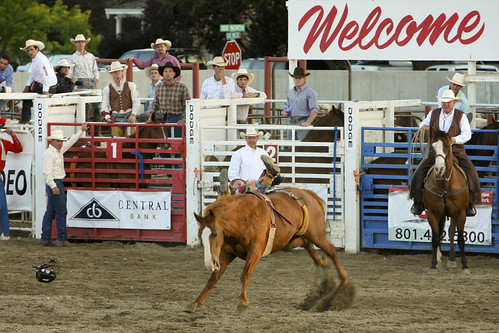
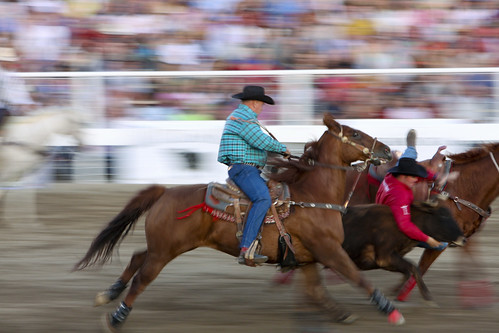
Here is the final product using this tutorial (in my photo in my last post I tweaked a few colors and stuff so things weren't as vibrant... That's all up to you from here):
final

Let me know if anything doesn't make sense or if you have questions.